Preparing AdHoc distribution in Titanium Mobile
Tuesday, February 14th, 2012 06:39 pm GMT +2

Appcelerator Titanium is a very promising technology which allows you to write native mobile applications in Javascript for both iPhone & Android.
After playing around a bit with Titanium Mobile, I decided to showcase technology strengths to our stakeholders, particularly by letting them use KitchenSink demo for iOS.
In order to distribute iOS application into real hardware you’ll have to pass through a bunch of Apple’s obstacles including:
- Registering as an apple developer & getting valid certificate
- Registering your app ID
- Creating provisioning profile for specific iPhone UDIDs
- Mess around with certificates/private keys to properly sign your application
It turns out that it’s not that easy to produce valid AdHoc distribution of your iOS app in Titanium, in this post I’m going to show you how to do it.
Before we start, make sure you have latest Xcode & Titanium SDK/Studio installed, as of the time of this writing Xcode version was 4.2.1, and Titanium mobile SDK was 1.8.1
For demo purposes we’ll use KitchenSink application provided as a showcase of Titanium mobile:
Clone & run KitchenSink in emulator
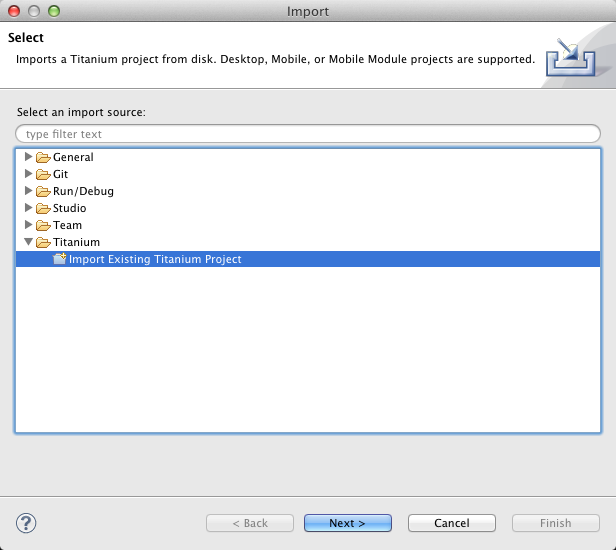
git clone https://github.com/appcelerator/KitchenSink.gitOpen Titanium Studio and select File->Import->Import Existing Titanium Project
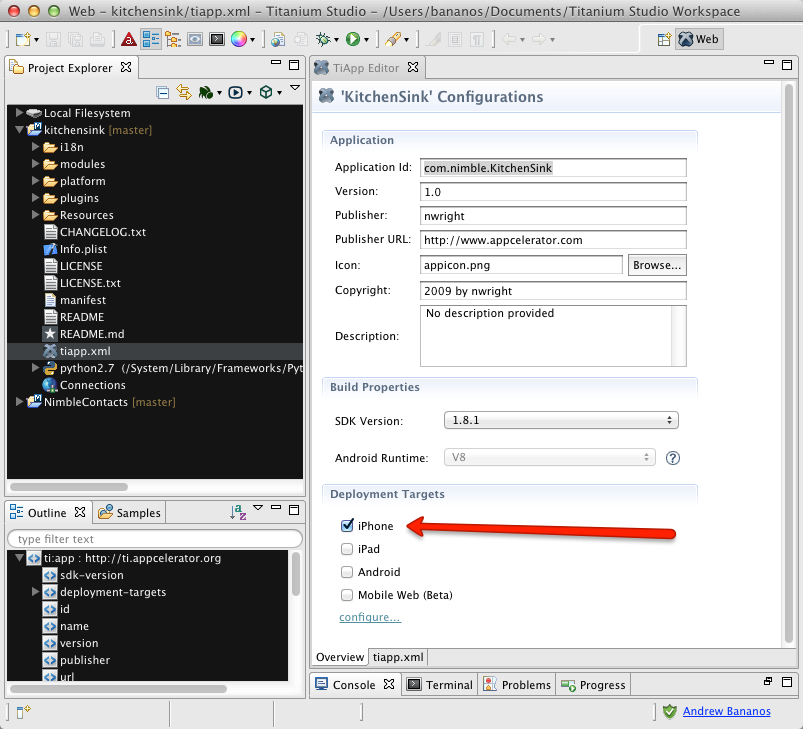
Configure project for iphone only
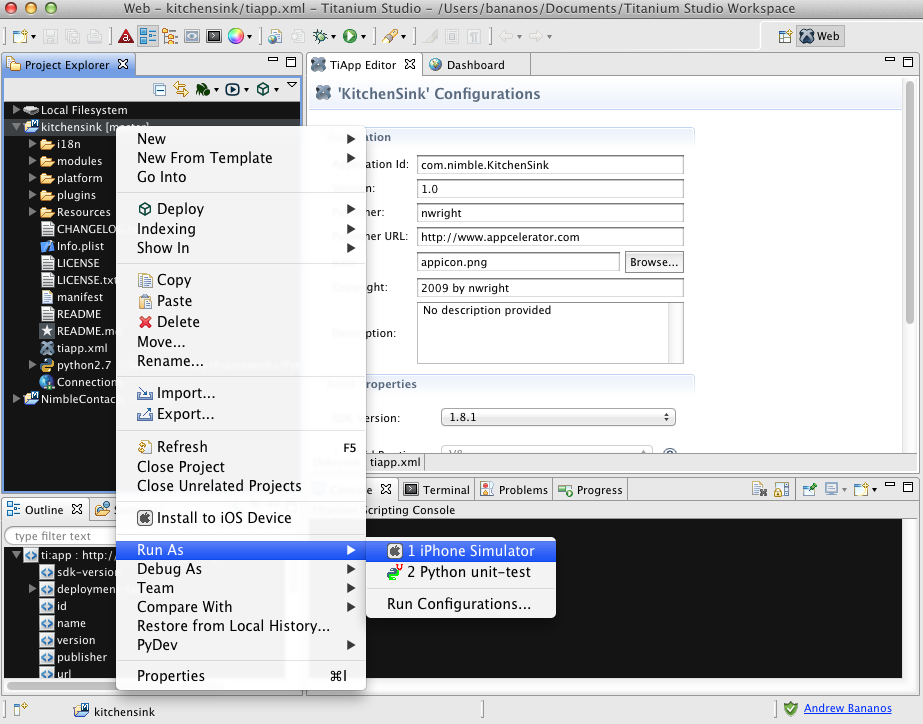
Run project on iOS simulator
At this point, Titanium will create an Xcode project for KitchenSink application. Wait for it to compile and run, then exit Simulator.
Open generated Xcode project
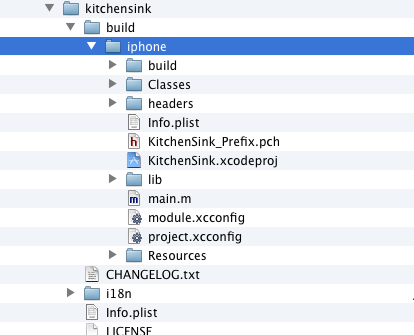
Run Xcode, and open KitchenSink.xcodeproj , Objective-C code could be found at kitchensink/build/iphone
Manage project schemas
In Xcode, open Product->Edit scheme:
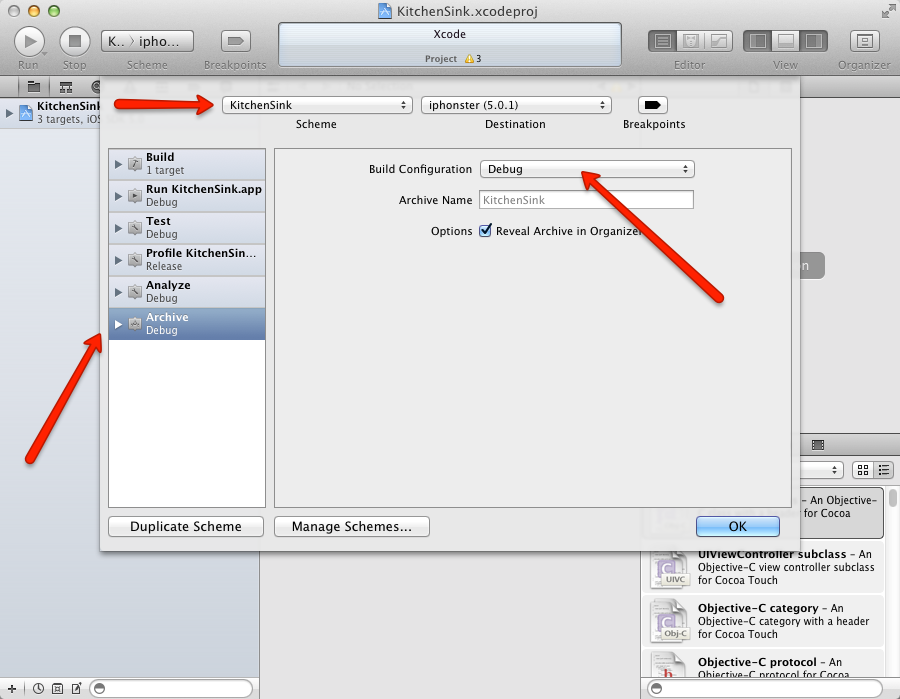
For each schema (KitchenSink, KitchenSink-iPad, KitchenSink-universal) select Archive and make sure that
Build Configuration is set to debug
Configure code signing for build targets
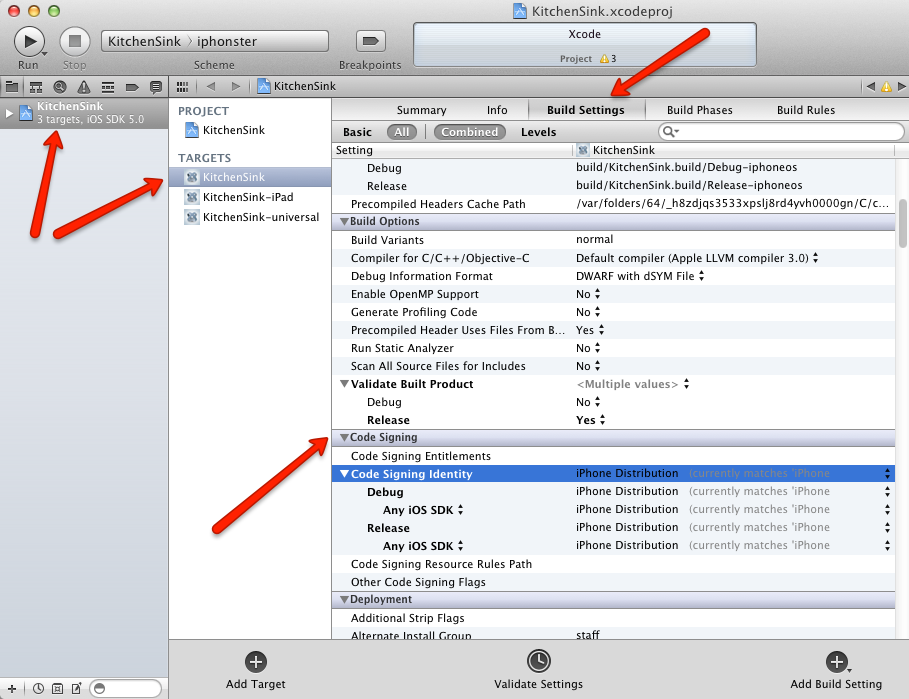
For each target, select Build Settings -> Code Signing -> Code Signing Identity
Make sure to select valid provisioning identity that you previously created on Apple’s provisioning portal for a particular iOS device/application. In my case, it was called com.nimble.KitchenSink and provisioning profile was called KitchenSink_AdHoc. For identities to be recognized by Xcode you should have been installed Apple Developer’s certificate as well as your organization certificate into MacOS keychain.
Archive (produce final IPA file)
Select KitchenSink target, then from the main menu choose Product->Archive
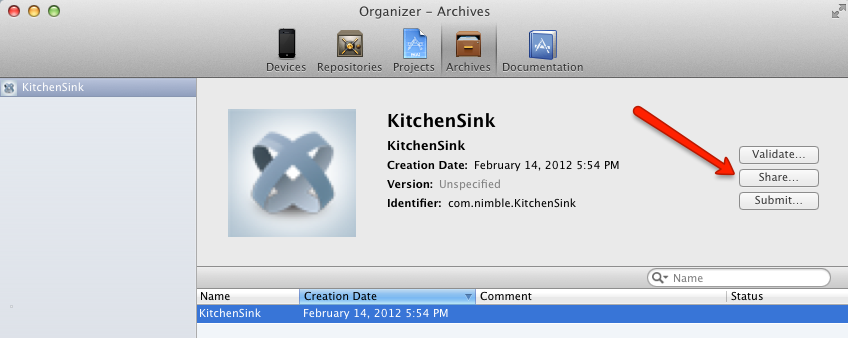
Wait for Xcode to compile & archive. You may find resulting Archive in Xcode Organizer:
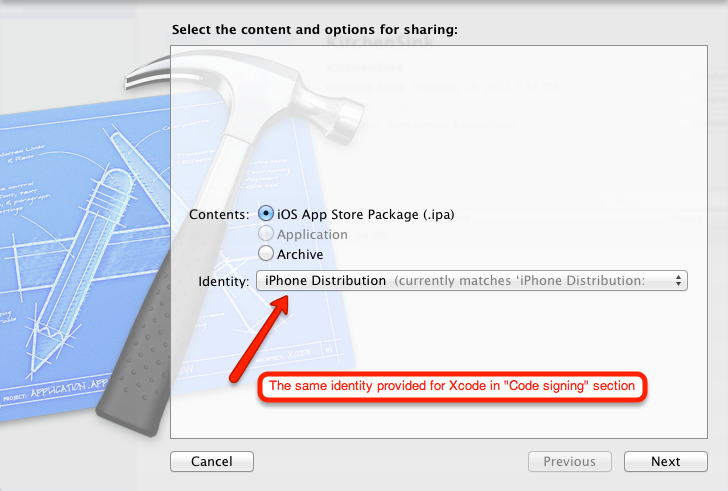
Click “Share” and provide the same identity which was used for Code Signing section above:
Save resulting IPA file along with corresponding KitchenSink_Adhoc.mobileprovision profile.
Install it on device
That’s the easiest part if you’ve done everything right. Just drag&drop mobileprovision & ipa files into iTunes and run sync with an actual iOS device.
If you missed something for code signing, during iTunes sync, you might encounter errors like this:
The executable was signed with invalid entitlements.
The entitlements specified in your application’s Code Signing Entitlements file do not match those specified in your provisioning profile.

Pingback: This Week in Titanium Mobile Development: 20 Feb 2012 | Titanium Development()
Pingback: This Week in Titanium Mobile Development: 20 Feb 2012 | TiDev()